
Contents:
Introduction
The Eurocircuits “New – Assembly service” requires customers to provide both BOM & CPL files, these allow us to provide accurate pricing and are necessary for the actual assembly off the PCB.
We identify BOM & CPL files uploaded to our Web server in two ways as below:
- Uploaded – files which are uploaded and saved in a specific Basket number on Eurocircuits web server.
- Imported – files which are imported to a specific Basket number on the on Eurocircuits web server ready to be used for the assembly of the PCB.
Uploading BOM or CPL Files
Method One
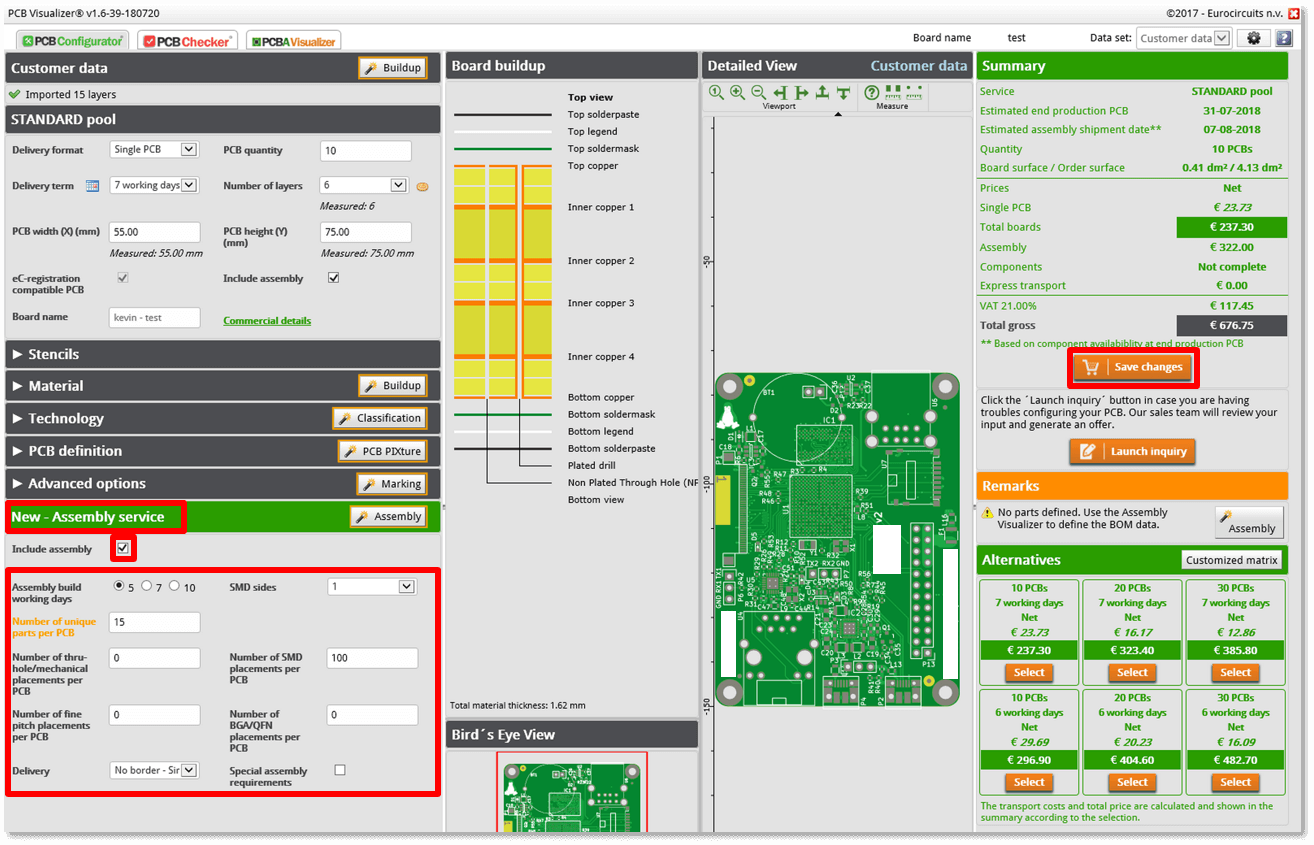
Open the appropriate Basket number in the PCB Configurator, then check the “Include assembly” box, this will then expand the “New – Assembly service” section where you are able to add more details.
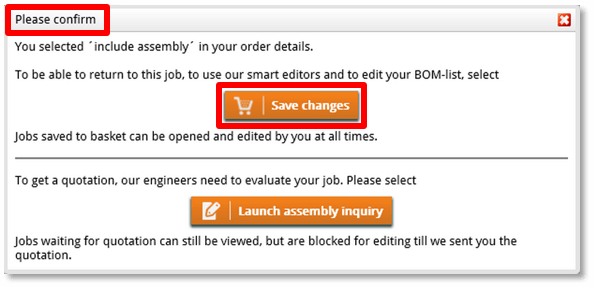
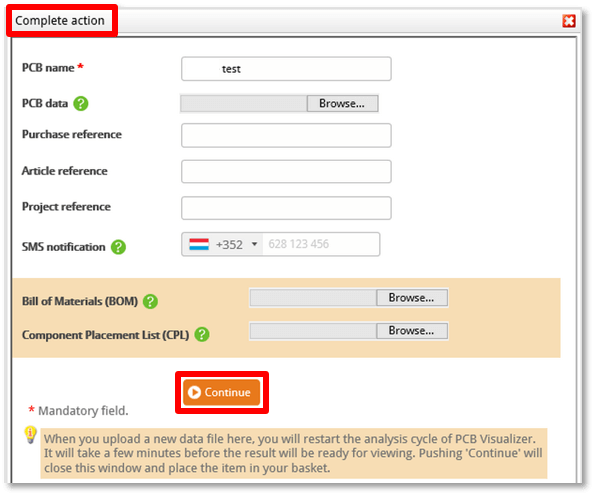
When the details have been added select the “Save changes” button, this will open the”Please confirm” pop-up window, here select the “Save changes” button, this will open the “Complete action” pop-up window. Here you are able to “Browse”and select your BOM & CPL files to be “Uploaded” to the job.
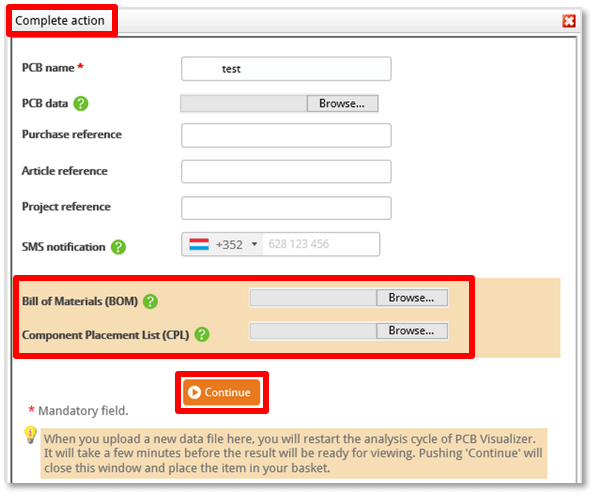
When the BOM and/or CPL files are selected the click on the “Continue”button this will upload and save them to the “Shopping basket”, please remember these files are only Uploaded and will not be used for the Assembly of the PCB until they are Imported.
Method Two
As with Method One, open the appropriate Basket number in the PCB Configurator, then check the “Include assembly” box, this will expand the “New – Assembly service” section where you are able to add more details.
Next select the PCBA Visualizer tab at the top of the window then either the “Assembly”or the “Edit assembly” button.

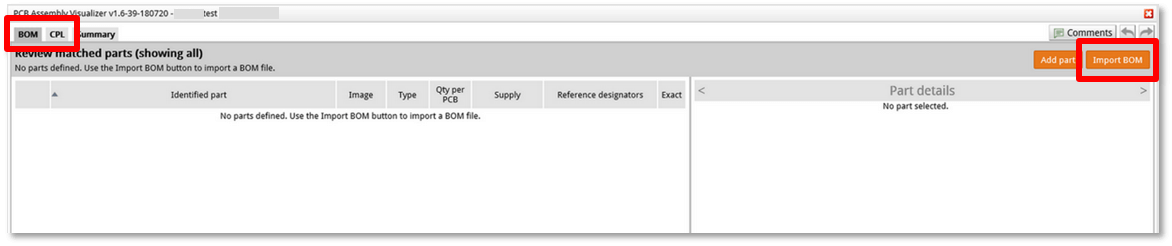
This will open a new window, select either the “BOM” or “CPL” tab (top left) depending which type of file you wish to Upload followed by the “Import BOM” or “Import CPL” button (top right).
A pop-up window will open allowing you to select the appropriate file to upload, when chosen select the “Open” button to Upload the file.

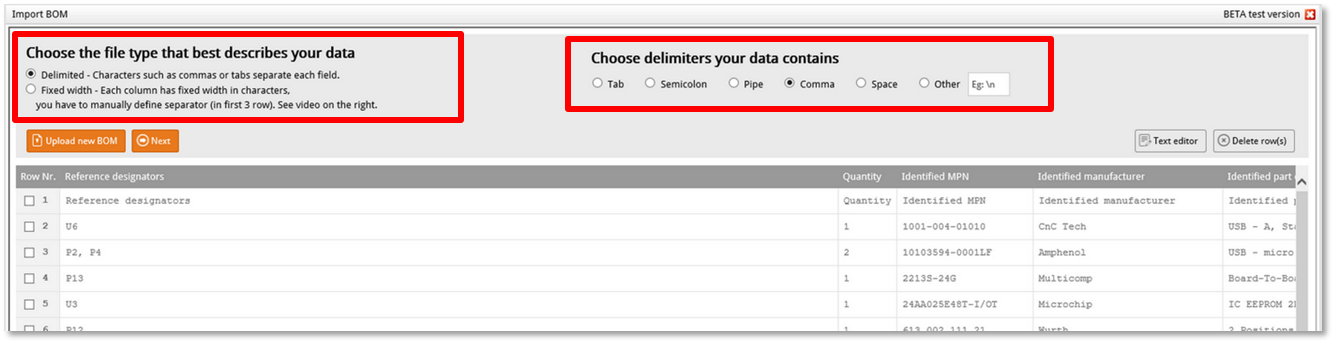
The data will be Uploaded and displayed as below, you are also able to change the file structure if there is a problem with the format.
At this point the BOM or CPL data is Uploaded and saved to the “Shopping basket” of the PCB, please remember these files are only Uploaded and will not be used for the Assembly of the PCB until they are Imported.
Replacing Existing BOM or CPL Files
To replace an existing Uploaded BOM or CPL file first open the appropriate Basket number in the PCB Visualizer.
Next select the PCBA Visualizer tab at the top of the window then either the “Assembly”or the “Edit assembly” button.
This will open a new window, select either the “BOM” or “CPL” tab (top left) depending which type of file you wish to replace followed by the “Import BOM” or “Import CPL” buttons (top right).
A new window will open displaying the current Uploaded data, select the “Upload new BOM” or “Upload new CPL” button as appropriate.
A new window will open, select the “Browse”button and then the appropriate file followed by the “Open”button.

This will upload the file and replace the original data.
At this point the BOM or CPL data is Uploaded and saved to the “Shopping basket” of the PCB, please remember these files are only Uploaded will not be used for the Assembly of the PCB until they are Imported.
Importing BOM or CPL Files
BOM or CPL data must be first imported to be used in the Assembly of the PCB.
Unlike Uploaded files where they are simply saved to the “Shopping basket” Imported files becomes part of the actual data used in the Assembly process.
To Import files open the appropriate Basket number in the PCB Visualizer, then select the PCBA Visualizer tab at the top of the window and then either the “Assembly” or “Edit assembly” button.
This will open a new window, select either the “BOM” or “CPL” tab (top left) depending which type of file you wish to Import followed by the “Import BOM” or “Import CPL” button (top right).
A new window will open displaying the current Uploaded data, select the “Next” button.

A new window will open where you define the scope of your data, here define which row contains the “Header” information and which row the actual component data starts and ends.
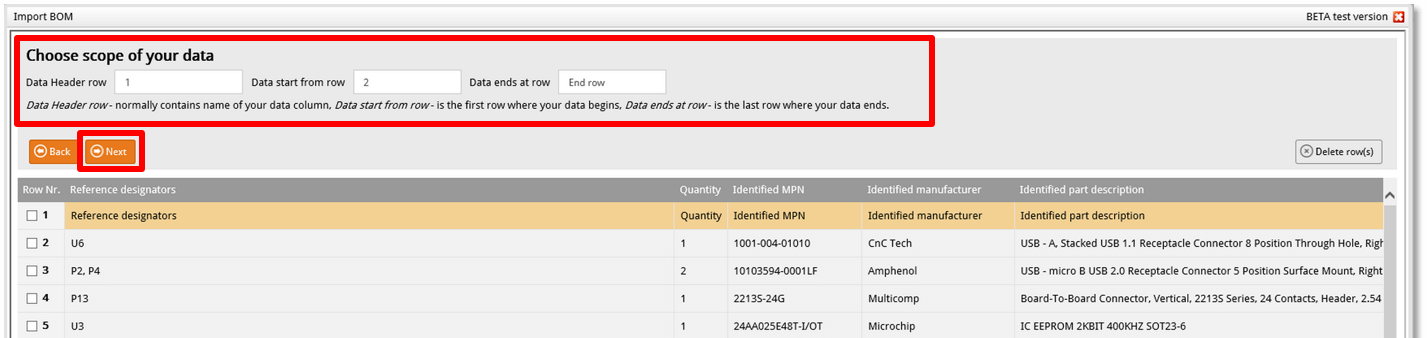
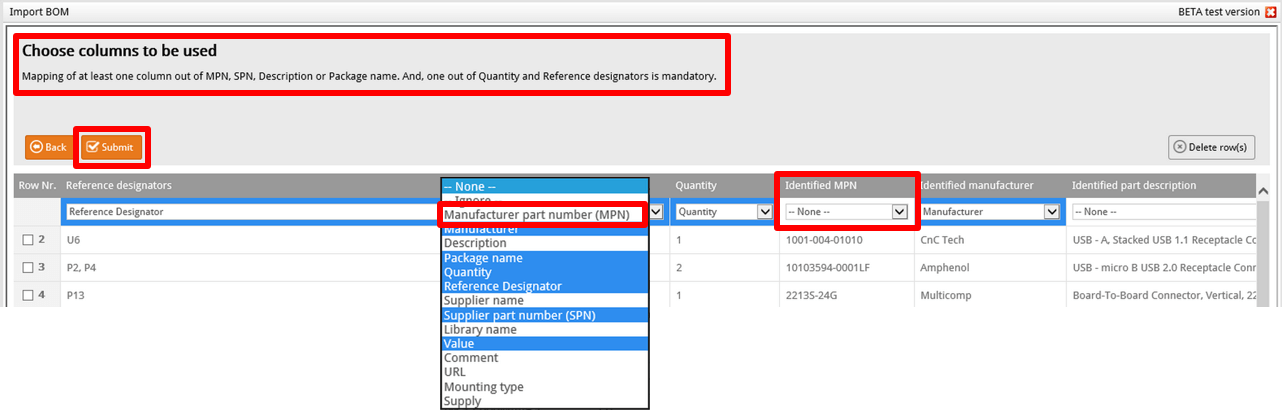
Once this is completed select the “Next”button. The next window to open allows you to “Choose columns to be used” to identify the components, we strongly recommend that you include the ‘”Identified MPN” column and select the “Manufacturer part number (MPN)” from the drop down list.
Once completed select the “Submit” button.
A new window will open with a list of parts and component information.
If any part could not be identified a warning “Part not identified” will appear in the “Identified part”column. At this point you should either Upload a revised BOM or select an equivalent part from our database.
To select an alternative part from our database, first select the part then double click on the text next to the “Package:” label in the “BOM data” section.
This will display a list of equivalent components in the “Proposed parts” section, simply double click on your choice and the part will be updated and the error message replaced by the selected component.

There may also be parts that need to be Approved, select the part by clicking onand then check the box “Approved:” in the “Identified part” section, the list will be updated and the part approved.

Once the list has been fully checked and all parts either “Identified”or “Approved” select the “Apply” button.

You will return to the PCBA Visualizer window as below, here select the “Save changes” button.

A pop-up window will open (Please confirm) select the “Save changes”button.
A new pop-up window (Complete action) will open, select the “Continue” button.
This will complete the import of the data and save the changes. The data is now ready for use during the Assembly process.
Your BOM/CPL data is now imported to your PCB and ready to be used in the Assembly process.


